
Codex CC Switch Graphical Configuration Tutorial
Codex is a programming agent launched by OpenAI, which determines where requests are sent through the custom model_provider in ~/.codex/config.toml. By pointing it to the OpenAI Responses compatible proxy of 辰汐ai, you can use Codex at a lower price without needing a separate subscription to the official OpenAI account. Manually writing TOML configurations is not user-friendly for beginners, while CC Switch provides a graphical interface to help you write config.toml and auth.json with one click and switch between multiple model providers instantly.
This article explains how to connect Codex to 辰汐ai using CC Switch.
This tutorial is an alternative to the handwritten
env_keytutorial. CC Switch usesrequires_openai_auth = true, reading the Token fromOPENAI_API_KEYin~/.codex/auth.json. Do not addenv_key = "..."to the same provider, nor mix in environment variable configurations from another tutorial; otherwise, Codex may retrieve incorrect credentials and return a 401.
¶ What is CC Switch
CC Switch (official website ccswitch.io) is an open-source, cross-platform desktop configuration manager used to unify the management of model provider configurations for multiple AI programming tools such as Claude Code, Claude Desktop, Codex, Gemini CLI, OpenCode, OpenClaw, and Hermes. It is built on Tauri 2 and is open-sourced under the MIT license, having received over 110,000 stars on GitHub (see farion1231/cc-switch).
For Codex, CC Switch will manage two configuration files for you (see the official User Manual and 5.1 Configuration File Description):
~/.codex/config.toml—stores model and interface configurations (model_provider,base_url,wire_api, etc.);~/.codex/auth.json—stores API keys.
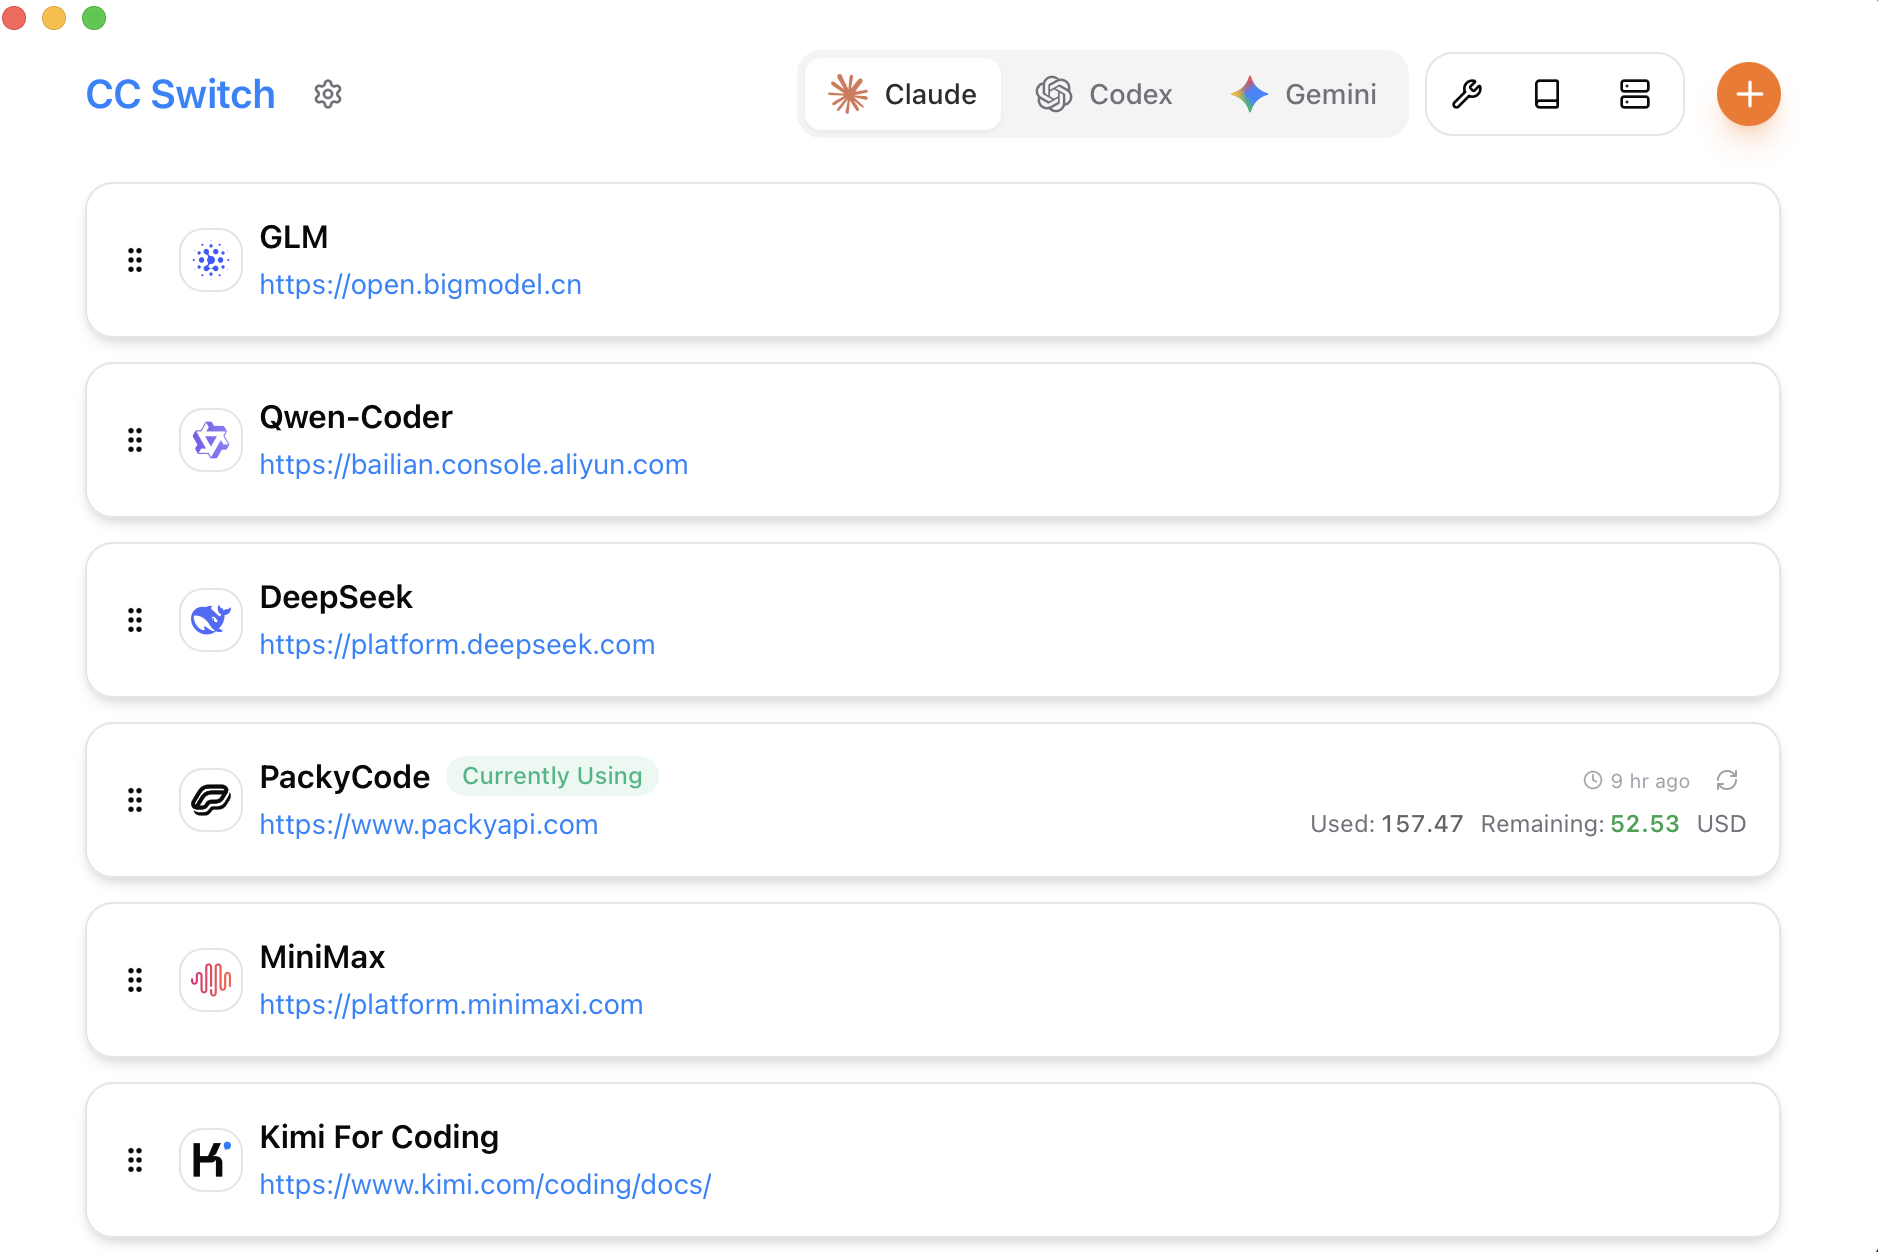
The official main interface of CC Switch is as follows (screenshot from CC Switch official repository):
¶ Apply for API Token
To use Codex, first go to the 辰汐ai Console to obtain your API Token for backup.

If you are not logged in or registered, you will be automatically redirected to the login page inviting you to register and log in, and after logging in or registering, you will be automatically returned to the current page. There will be a free quota offered for first-time applicants, allowing you to experience Codex services for free.
¶ Download and Install CC Switch
Go to the CC Switch Releases page (or directly download the latest version) and choose the corresponding installation package based on your operating system. The following installation methods are all from the official README:
| Operating System | System Requirements | Installation Method |
|---|---|---|
| Windows | Windows 10 and above | Download CC-Switch-v{version}-Windows.msi installer, or -Windows-Portable.zip portable version |
| macOS | macOS 12 (Monterey) and above | Recommended brew install --cask cc-switch, or download .dmg (signed and notarized by Apple, can be opened directly) |
| Linux | Ubuntu 22.04+ / Debian 11+ / Fedora 34+ | Download .deb / .rpm / .AppImage; Arch users can use paru -S cc-switch-bin |
¶ Add 辰汐ai Model Provider
CC Switch has built-in presets for over 50 model providers, but currently does not include 辰汐ai, so we will add it using the "Custom" method. The following steps correspond to the official documentation 2.1 Add Provider.
- Switch to the Codex application at the top of CC Switch.
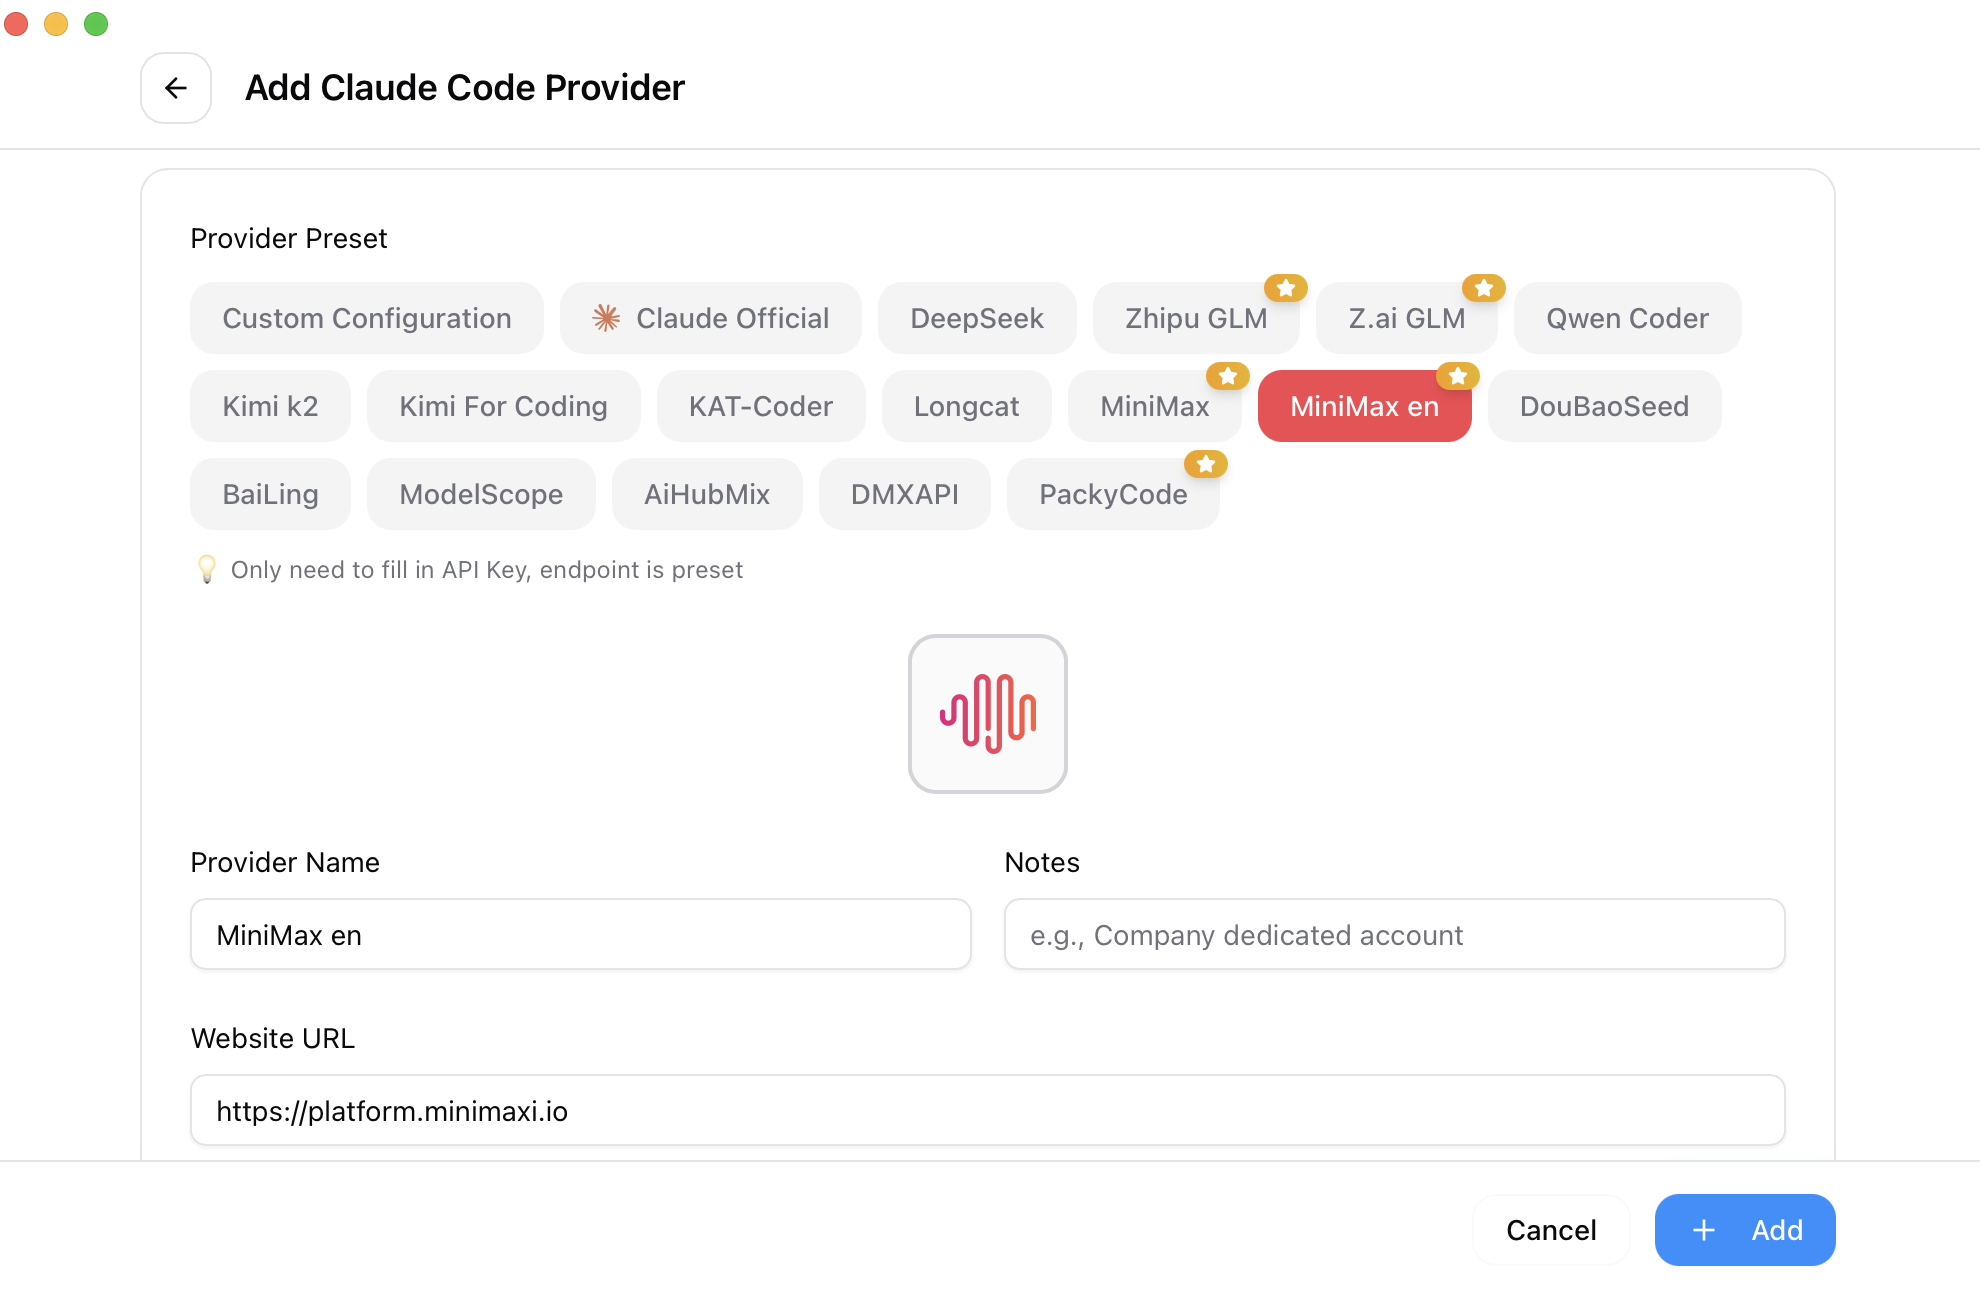
- Click the + (Add Provider) button in the upper right corner to open the add panel.
- Select Custom from the preset dropdown, then fill in the configuration.
The official CC Switch "Add Model Provider" panel is as follows (screenshot from CC Switch official repository):
Fill in the following information:
| Field | Content to Fill |
|---|---|
| Name | Ace Data Cloud (customizable) |
| Base URL | https://api.acedata.cloud/v1 |
| API Key / Token | The API Token you copied from the console |
The custom configuration for Codex consists of two files (format as per the official Codex Configuration Format). CC Switch will write the following into ~/.codex/config.toml:
model_provider = "acedatacloud"
model = "gpt-5"
model_reasoning_effort = "high"

[model_providers.acedatacloud]
name = "Ace Data Cloud"
base_url = "https://api.acedata.cloud/v1"
wire_api = "responses"
requires_openai_auth = true
And into ~/.codex/auth.json:
{
  "OPENAI_API_KEY": "{token}"
}
Where {token} is replaced with the API Token you copied from the 辰汐ai console. After verifying that everything is correct, click Add to complete the addition.
The explanations for each field are as follows:
| Field | Description |
|---|---|
model_provider |
The key for the default model provider, must match acedatacloud in [model_providers.acedatacloud] exactly (including case) |
model |
The default model ID, recommended gpt-5 |
model_reasoning_effort |
Reasoning intensity, common values are low, medium, high |
base_url |
The OpenAI Responses proxy address for 辰汐ai, must be https://api.acedata.cloud/v1 |
wire_api |
Protocol type, must be responses for using OpenAI Responses API |
requires_openai_auth |
Set to true to allow Codex to use the key in auth.json as the authentication credential |
No need to enable Local Routing: The "Local Routing / Model Mapping" of CC Switch is only used for model providers that only support the OpenAI Chat Completions protocol or use non-GPT series model names (such as DeepSeek, Kimi). 辰汐ai belongs to the native Responses protocol model provider (
wire_api = "responses"), so keep Needs Local Routing off, see the official 2.1 Add Provider - Codex Presets.
¶ Enable and Switch Model Provider
After adding, find the 辰汐ai card in the Codex model provider list and click Enable (refer to the official 2.2 Switch Provider). You can also directly click the model provider name from the system tray menu for instant switching.
Need to restart: According to the official FAQ, except for Claude Code which supports hot switching, tools like Codex need to restart the corresponding CLI or terminal after switching model providers to take effect.
¶ Use in Terminal and VS Code
CC Switch is only responsible for writing configurations, the Codex itself still needs to be installed separately. After enabling the model provider:
- Terminal CLI: Install and run
codex, the complete steps can be found in the Codex Terminal Configuration Tutorial. After entering the interactive interface, type/model, and you should see the current model provider asacedatacloud. - VS Code Extension: Install the official OpenAI Codex extension from the extension marketplace (Marketplace ID:
openai.chatgpt), the complete steps can be found in the Codex VS Code Configuration Tutorial. Since the VS Code extension and CLI share the same~/.codex/config.tomlconfiguration, the VS Code extension will directly reuse it after CC Switch is set up.
¶ Verify Configuration
You can verify whether Codex can work through 辰汐ai with the same configuration in the terminal:
codex exec --model gpt-5-mini "Reply with exactly: ADC_Codex_OK" < /dev/null
If the configuration is correct, you should see a response like:
ADC_Codex_OK
¶ Switch Model
The model field in ~/.codex/config.toml determines the model that Codex uses by default. 辰汐ai's OpenAI Responses service supports various models, commonly including gpt-5 (recommended default), gpt-5-mini (lighter), gpt-5.5, gpt-5.5-pro, etc. For a complete list of models and billing information, refer to the 辰汐ai OpenAI Service Documentation. You can also automatically discover available models from the /v1/models endpoint in the CC Switch model provider form by using the "Fetch Models" button (refer to the official Auto-Fetch Models).
¶ Check Quota and Usage
- Check the current account's remaining quota through the 辰汐ai Console - Application List.
- Check all request records and billing details through the 辰汐ai Console - Usage History.
¶ Frequently Asked Questions
- Return 401 invalid token? Check in order:
model_provider = "acedatacloud"matches exactly with[model_providers.acedatacloud]. For example, if written asmodel_provider = "OpenAI", the configuration block must also be called[model_providers.OpenAI]; do not let the name point to another provider.- The current provider should only keep
requires_openai_auth = true, do not writeenv_key = "DASHUN_API_KEY"or other environment variable names at the same time. - The
OPENAI_API_KEYin~/.codex/auth.jsonis the current 辰汐ai Token, not an old official account or expired Token. - Remove non-standard items like
X-Providerfrom the Header overrides. They are not universally required configurations for Codex custom providers. - After saving, completely exit and restart CC Switch, Codex, terminal, or VS Code, then run the minimal verification command in this document.
- Not effective after switching? Confirm that Codex / terminal has been restarted; and check if
model_providerin~/.codex/config.tomlpoints toacedatacloud. The location of CC Switch's configuration file is explained in the official 5.1 Configuration File Explanation. - How to switch back to official login? Add the OpenAI Official model provider from the preset list, Codex supports switching between multiple official accounts (refer to the official FAQ).
- Where is the configuration data stored? CC Switch's own data is stored in
~/.cc-switch/cc-switch.db(SQLite), and the effective configuration is written to~/.codex/config.tomland~/.codex/auth.json.
¶ Reference Sources
- CC Switch Project Repository: https://github.com/farion1231/cc-switch
- CC Switch Official Website: https://ccswitch.io/
- CC Switch User Manual: https://github.com/farion1231/cc-switch/blob/main/docs/user-manual/en/README.md
- Add Model Provider (2.1 Add Provider): https://github.com/farion1231/cc-switch/blob/main/docs/user-manual/en/2-providers/2.1-add.md
- Configuration File Explanation (5.1 Config Files): https://github.com/farion1231/cc-switch/blob/main/docs/user-manual/en/5-faq/5.1-config-files.md
- Codex IDE extension official documentation: https://developers.openai.com/codex/ide
- 辰汐ai OpenAI Service Documentation: https://www.chens.中国/documents/openai